The BTX-BOOKITRMB recessed mount brackets (sold separately) work with the mounting bracket included with BookIT.
Installation Instructions:
Loosen the two bottom mounting screws but do not remove them completely.
Remove mounting bracket from unit.
Select mounting location, level bracket and trace the outer perimeter of the back of the bracket on wall.
Cut out the traced opening (You can fine tune the opening during a dry fit.)
Install the two flush mount brackets using the four 6-32 x 2″ screws and four #6 flat washers to the display bracket as shown in the diagram. Thread the screws until the screw tip is flush with the back of the brackets.
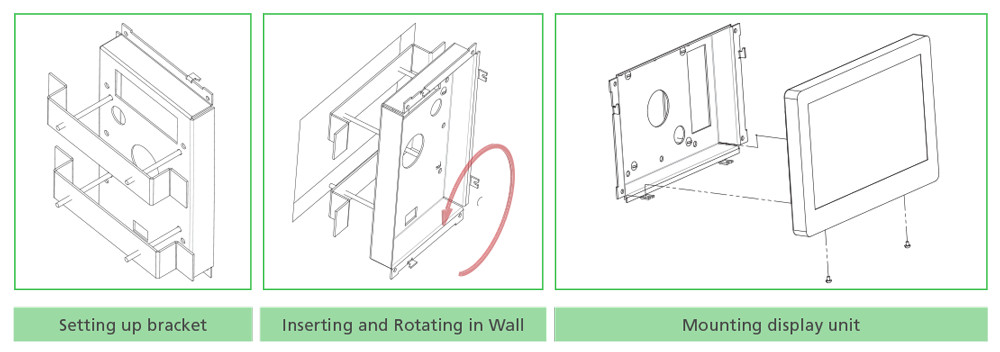
Rotate the mount 90 degrees to the mounting cutout and guide the brackets into the cut out.
Once the brackets clear the inside of the mounting surface, rotate the mount (the screws will give some resistance while rotating) so that the top is pointing up.
Insert the mount into the cut-out so that it is flush with the wall.
Tighten the four screws on the brackets until the mount is secure in the wall.
Plug the network cable into the BookIT display. Also plug in the power cable if PoE is not available.